Monday, February 2, 2009

February 2009 - Layout to Card

Late last week my Stampin' Up!® Upline Sharlene Meyer had a card on her blog that she'd made using the leftovers from an earlier Scrapbook Layout that she'd created. Aha I thought what a great way to have cards on hand, what a great way to use scraps and what a creative way to tidy up and also what a great tutorial for Stampin' Scrap.

Here is the LO that I created first. I used sketch no. 28 from 'The Little Shop of Sketches'.

Supplies used all Stampin' Up!® -

Stamp set - Sprinkles

Cardstock and Papers - Yoyo Yellow, Brillian blue, Pumpkin Pie, Brilliant blue Designer Series Prints

Ink - Versamark, Pumpking Pie Classic Ink, Pumpkin Pie Stampin' Write Marker

Punches - Large Star and Star

Other - Paper Cutter, Snail Adhesive, Cotton Balls.

I was then left with the leftovers sitting on my desk. Obviously I had to add something to replace the 12x12 Yoyo Yellow card and a main image to replace my photo. I replaced the yoyo yellow 12x12 with a yoyo yellow 14cm sq card blank and added a stamp set, ink pad, cardstock and a marker to create to create a central image.

Starting with the 14cmx14cm card blank I used the heart background stamp from the Sprinkles set and repeatly stamped it to cover the card using Versamark Ink, creating a watermark background.

Then taking whisper white cardstock cut to 13x8cms for my main image I stamped the largest star from 'In the Stars' stamp set in brilliant blue ink.

The large star was again stamped this time on a post it note, making sure that one part of the image had the adhesive on the back. Cut out the star just inside the lines and place it over the first stamped star.

While the image is covered stamp around it and over it with a smaller star in Pumpkin Pie ink using second and third impressions. By this I mean ink your stamp and stamp once on scrap paper and then stamp the second and third times on the card. When you've stamped around the first star, move your post it note mask to the next image and repeat.

I felt looking at the star images sitting on the yellow card blank that it needed a small amount of yellow to tie the two together so stamped a smaller star in the gaps using a Summer Sun Stampin' Write Marker. I then edged the whisper white card by running it through the brilliant blue ink pad.

Using the leftover strips of pumpkin pie cardstock and brilliant blue dsp from the LO snip three of them shorter and cut a triangle in one end. Place them as shown in the photo above. Adhere to the base card and adhere the whisper white cardstock over the top.

Punch a couple of small stars from left over cardstock and attach to the card as a finishing touch. You could add a greeting with a stamp or rub on to the bottom right hand corner if you wished.
Now tidy up a little less than you had before.

Wednesday, January 14, 2009

January 2009 - Chocolate for Valentines

The box I've chosen to make this month started with a Workshop Wizard template given to the New Zealand demonstrators for Sale-A-Bration. I've adjusted it to make it work with double sided patterned paper and have changed the colours to make it more masculine as generally it's the ladies that make these sort of gifts for their valentines.


The chocolate I've used to fill my finished box are Guylian and come in a box of 30 for about $8.00. So not a bad price as you'd be able to make presents for about 3 valentines from one box.

Here we go: -

You will need to have in front of you: -
Double sided patterned paper 21cms x 21cms - I used Outlaw from Stampin' Up!®
Bone Folder
Ribbon - I used 5/8" Grosgrain Very Vanilla
Stamp Set and Ink Pad - Mine is Yummy by Stampin' Up!® and Chocolate Chip & Ruby Red Classic Ink
Scraps of Cardstock - I used Very Vanilla
Scissors
Adhesive
Chocolate
Large Star Punch and Scrap of Co ordinating Coloured Card


Start with your sheet of Double Sided Paper. The method we are using will work with any size square.


Fold your square into a triange and fold down the top corner so the point is just above the bottom fold.

Fold the top corner back into place and fold the right hand corner of the triangle so the top straight edge runs along the crease formed by the last fold.

Do this again with the left hand side and bring the top flat back down. You now have your pouch time to decorate it.


I chose to place ribbon across the front of the pouch securing it with adhesive at the centre. To make the ribbon fit the sloped edges nicely I have folded it and adhered it across the back at an angle.

To tidy up the back of the box I punched a large star from a scrap of really rust cardstock and stuck it over the top of the ribbon join.


Stamp your chosen image onto cardstock and cut around it leaving a small border.

Attach it over the top of your ribbon. I was able to stick mine just over the edge of the top flat so it stays down nicely.


I then punched a second image, as I wanted the heart, in ruby red ink and cut around the heart with my scissors.


I adhered the heart with some 2 way glue and then filled the pouch with chocolate. All ready for my Valentine.


And another option for your smaller valentines are these Peek A Boo Treat boxes that take just one chocolate square.


The instructions can be found here on Splitcoaststampers.

Sunday, November 30, 2008

December 2008 - Quick and Easy Christmas Tree Decoration

Grab out just a few essential supplies and a few moments of your time and you're set to go with this one. When you get started with these tree decorations you'll find you've made a dozen in just a few minutes.
Your supplies: -
Sheet of Double Sided Paper - I used a 6" x6" sheet
Scallop Circle Punch - mine is approximately 4.5cms across
Adhesive
Beads
Linen Thread or Fine Ribbon
Bone Folder
Sharp Scissors
Punch out eight scallop circles from your double sided patterned paper. You can use any even number of scallops in your decoration.

Fold your scallop circle in half and score the fold.

Using adhesive between each scallop, I used double sided tape, layer each scallop on top of each other alternately the patterns.

This is what the straight edge should look like.


Fold a length of Linen Thread of fine ribbon in half to form a loop suitable for hanging your decoration and attach to the straight edge as shown in the photo above with double sided tape.

Thread beads on both ends and tie a knot to hold them in place.

Attach the sides of the sandwich together to form a circle with double sided tape. Trim ribbon ends and hang.

Friday, October 31, 2008

November 2008 - Many Uses for Stampin' Write (Brush) Markers!

I just love Markers!!! They were one of my first purchases as a newbie stamper many years ago and with the Stampin' Write Markers matching the inkpads, cardstock and everything else in the Stampin' Up! range they are still very well used in my crafting.

I came up with a list of all the things that you can use Stampin' Write Markers for: -

- Colouring

- Inking rubber stamps

- Thumping technique

- Colouring Ribbon

- Doodling

- Hightlighting/Shadowing an image

- Watercolouring with blender pens or aqua painters or water spritzing

- Colour Spritzing

- Edging Cardstock

- Journalling

I know I will have missed some.

I have used some of the techniques above in the tutorial today and will happily answer questions on any of the others.

This is the card we are going to make: -


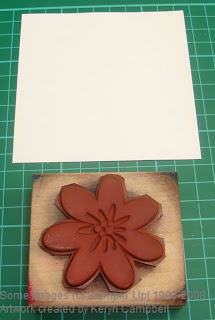
Take a piece of watercolour paper cut bigger than your chosen image. I have chosen the solid flower from Stampin' Up!'s Bodacious Bouquet Set.

Choose markers from your collection with colours that blend together nicely.
The Stampin' Write Markers have a brush at one end and a journalling tip at the other. Using the side of the brush tip colour in the stamp. I used Summer Sun for the centre spots then More Mustard, Really Rust and Ruby Red outwards from the centre of the flower petals.

Hold the coloured stamp about an arms length away from a fine mist spray bottle and gently spray the stamp with water. The trick is not to drench the coloured stamp. Then stamp onto your watercolour paper. The wetter the rubber the more the colours will run together. Experiment to see what works best for the look you are trying to achieve.


Stamp your flower image on a piece of scrap paper. I used a second stamped image. Cut around the flower just inside the edge of the image. I only cut around the petals where I knew I wanted the leaves to show. Place the mask over your stamped image on the watercolour paper.


With my Garden Green Stampin' Write Marker I coloured in the Bodacious Bouquer small leaf stamp. When you ink a stamp with a marker you need to breath over the image before you stamp it to keep the ink wet.


Stamp the leaf image over the mask and watercolour paper in the desired position. Re ink with the marker and stamp again. Remove the mask from the flower.The leaves look to be sitting behind the flower.Take the journalling end of the markers and use the matching colour to run around the outside of the image to define it.
Lining up the outside of the image against the inside of the Fiskars Cutter's blue bar trim the image.


Using the side of a marker brush tip edge your watercolour paper with colour. I used Really Rust. Not necessary but is a nice finishing touch.


Mat the flower image onto contrasting cardstock and trim using the Fiskars trimmer.


Adhere your flower image to a card blank. I used a 10cmx10cm square of Really Rust cardstock.


Choose a salutation for the base of your card. I want Get Well Wishes, but the perfect word stamp has an image as well.


Use the side of the brush tip on your chosen marker to ink only the part of the image that you want to use. It is important to make sure that the whole image is super clean and dry before you start to avoid transferring unwanted residue to your card.


Breathe on the inked stamp to rewet the ink, postion and stamp. You're all done.

I would love to see the papercraft projects that you make using Markers. Please leave me a comment with a link to your projects.

Thank You!

Tuesday, October 21, 2008

October 2008 - Heat Embossing

Heat embossing is the technique that approx 11 years ago started me cardmaking, then over the years with all the beautiful papers and embellishments that hit the market heat embossing lost popularity. Just recently I’ve been asked to demonstrate heat embossing by a number of my workshop hostesses. Here is a step by step tutorial on heat embossing for you:

First start with a folded A5 card blank. I used one in very vanilla.
Put your card blank away for later and grab a scrap of card the same colour. I then stamped the background stamp from Stampin’ Up!®;s ‘Oh So Lovely’ Stamp Set on my card scrap in Perfect Plum Ink.

I then choose one of the flower stamps from the same stamp set and stamped it in versamark ink over the background image. Make sure the background image is very dry before you do this. As versamark ink is clear there was nothing to see in a photo.


I then folded a scrap piece of copy paper in half placed my stamped image on top of it and tipped rather than sprinkled gold embossing powder over the image.


Tip the embossing powder off the stamped image and tap the back of the cardstock to get rid of stray specks of powder. At the same time use the folder piece of copy powder to funnel the excess powder back into your container.


Hold your heat tool over the image on a heat resistant surface, I used my ceramic cook top, until the image turns shiny and raised.

Move the heat tool slowly until the entire image has turned.

Using my Fiskars Paper Trimmer I lined up the edge of the background stamp against the inside edge of the blue bar and then cut. Placing the cut edge on the bottom bar I moved around the image lining up the edge of the image against the inside of the blue bar.

Next run the edges of the cardstock through your versamark ink pad and then through some gold embossing powder poured onto your copy paper.

Cook the embossing powder with your heat tool as before. Watch your fingers this time.

Adhere your stamped and embossed card onto a larger piece of coloured cardstock to mat it. I’ve used perfect plum to match my ink. Then using the paper trimmer I lined up the edge of the vanilla card with the inside of the blue bar and cut the perfect plum card.


To add a little bit interest to the flowers I pushed the lid of my perfect plum inkpad into the ink and using a blender pen used this ink to colour in the flowers.

Then to add even more interest I coloured in the flowers again but this time with a glue pen. Then place your cardstock onto another piece of folded copy paper and pour over microfine clear glitter, I used dazzling diamonds.


Tip off the excess glitter into the copy paper and funnel back into your glitter container.

Place your decorated cardstock onto the top corner of your very vanilla cardstock but don’t stick down yet.

Stamp your chosen word stamp with versamark into the bottom right hand corner of your card.
Cover with gold embossing powder as before.


Heat embossing powder as before.


Adhere embellished cardstock piece to top left corner of card blank and you’re all done.

I would love to see any projects you’ve created using heat embossing, or colouring with ink and a blender pen or using microfine glitter.

If you do not have access to a heat tool it is possible to turn embossing powder over a toaster. Just press the button down as tho. you are cooking your toast and hold the cardstock over the top of the very hot toaster. Don’t burn your fingers.