I came up with a list of all the things that you can use Stampin' Write Markers for: -
- Colouring
- Inking rubber stamps
- Thumping technique
- Colouring Ribbon
- Doodling
- Hightlighting/Shadowing an image
- Watercolouring with blender pens or aqua painters or water spritzing
- Colour Spritzing
- Edging Cardstock
- Journalling
I know I will have missed some.
I have used some of the techniques above in the tutorial today and will happily answer questions on any of the others.
This is the card we are going to make: -

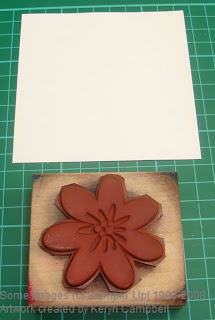
 Take a piece of watercolour paper cut bigger than your chosen image. I have chosen the solid flower from Stampin' Up!'s Bodacious Bouquet Set.
 Choose markers from your collection with colours that blend together nicely.
 The Stampin' Write Markers have a brush at one end and a journalling tip at the other. Using the side of the brush tip colour in the stamp. I used Summer Sun for the centre spots then More Mustard, Really Rust and Ruby Red outwards from the centre of the flower petals.
 Hold the coloured stamp about an arms length away from a fine mist spray bottle and gently spray the stamp with water. The trick is not to drench the coloured stamp. Then stamp onto your watercolour paper. The wetter the rubber the more the colours will run together. Experiment to see what works best for the look you are trying to achieve.

Stamp your flower image on a piece of scrap paper. I used a second stamped image. Cut around the flower just inside the edge of the image. I only cut around the petals where I knew I wanted the leaves to show. Place the mask over your stamped image on the watercolour paper.

With my Garden Green Stampin' Write Marker I coloured in the Bodacious Bouquer small leaf stamp. When you ink a stamp with a marker you need to breath over the image before you stamp it to keep the ink wet.
 Stamp the leaf image over the mask and watercolour paper in the desired position. Re ink with the marker and stamp again. Remove the mask from the flower.
 The leaves look to be sitting behind the flower.
 Take the journalling end of the markers and use the matching colour to run around the outside of the image to define it.
Lining up the outside of the image against the inside of the Fiskars Cutter's blue bar trim the image.

Using the side of a marker brush tip edge your watercolour paper with colour. I used Really Rust. Not necessary but is a nice finishing touch.

Mat the flower image onto contrasting cardstock and trim using the Fiskars trimmer.
Adhere your flower image to a card blank. I used a 10cmx10cm square of Really Rust cardstock.
 Choose a salutation for the base of your card. I want Get Well Wishes, but the perfect word stamp has an image as well.

Use the side of the brush tip on your chosen marker to ink only the part of the image that you want to use. It is important to make sure that the whole image is super clean and dry before you start to avoid transferring unwanted residue to your card.
 Breathe on the inked stamp to rewet the ink, postion and stamp. You're all done.
I would love to see the papercraft projects that you make using Markers. Please leave me a comment with a link to your projects.
Thank You!


No comments:
Post a Comment