plus some tips and tricks to make making lots of cards at one sitting a lot quicker and easier.
I love sending cards and it beautifully ties in with my love of making them but sometimes I want to send more than I have time to make. This is where keeping it simple and moving from my office into the lounge with limited supplies works really well. I also used this opportunity to use up scraps of In Colour cardstocks, cutting them into 9.9cm square and 3" square card bases.
These were the supplies that I had: -
- cut, folded and creased card bases
- whisper white card scraps
- matching classic stampin' pads
- fast and fabulous and teeny tiny stamp sets
- word window punch
- big shot and perfect poka dots textured impressions embossing folder
- stampin' dimensionals, stampin' sponges, paper cutter, sanding block, snail adhesive, bone folder, stampin' scrub.
One way to quickly fill up a blank space is to add dry embossing using an textured impressions embossing folder and the Big Shot. To only emboss the front of the card turn the embossing folder in a landscape direction and align the first row the polka dots along the centre fold of the card. Still keeping the embossing folder in a landscape orientation run through your Big Shot as usual.
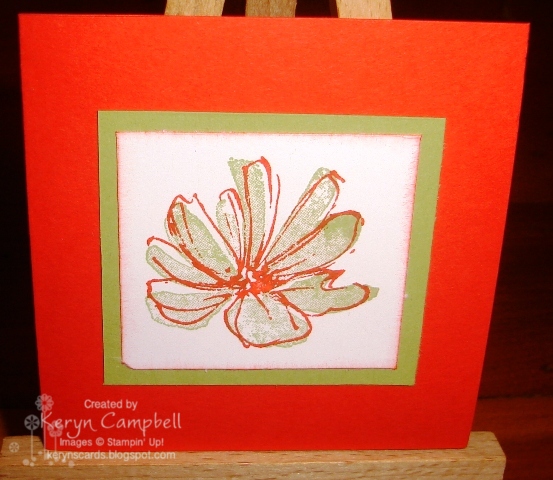
Two step stamping is a very quick way of getting the look of a coloured image using only two stamped images.
My favourite Two Step Stamp Set at the moment is the Level Two Hostess Set fast and fabulous. Here I've stamped the solid flower in the lighter 'Blushing Bride' ink and then stamped the matching outline image over the top in the brighter 'Melon Mambo' to match my card base.
Trim leaving approx 3mm around the image. I like to sponge the cut edges to match the card base.
I use Stampin' Dimensionals or foam tape to stick my image down onto the embossed card base. The foam moulds around the textured surface.
To add a greeting I used the 'thank you' stamp from the Clear Mount Teeny Tiny sentiments stamp set. When working with clear blocks and tiny stamps like these ones I place my stamp down on my work surface and then press the block down onto the stamp. I find it stays put much better if I attach them this way round.
Stamp your image, punch out with the Word Windown punch and assemble your card.
This is one of the 3" square blanks in Poppy Parade and Pear Pizazz. The same as the bigger one but without the dry embossing due to the smaller card size.
Another version of the smaller sized card: -
I trim most of my stamped images using a Fiskars Paper Cutter and aligning the edge of the blue bar right on the edge of the image on all sides placing the last cut edge on bottom edge of the trimmer to keep it square.
The 'whisper white' cardstock from Stampin' Up!® has a high cotton content and so takes ink really well but this always means that cut edges can sometimes be a bit fluffy, like mine in the photo. If this happens I easily got rid of the fluff with a sanding block and/or flicking colour on to the edges with a stampin' sponge.
Adhere your trimmed image to a larger piece of card for your mat.
Using the same technique as the one I used to cut around the image I cut the Pear Pizazz mat using the white edges as my guide.
I hope you enjoyed this tutorial.
 Share
Share


No comments:
Post a Comment