Tuesday, July 9, 2013

MDS - Launch Bag Tag - Rotating Text

Going to MDS I chose my project a 2 1/2 x 4 1/4" tag and chose the 'designer' option instead of 'create your own'.  Scrolling through it was the very last option that caught my eye - 'A  Little of This - thanks'.

 
I selected the following options to remove the bleed area, which also removed the mark for the hole.


I wanted to add a name to each tag so used the text options to do this and to colour it to match the colours in the tag.  I chose to use 'Taken with Teal'. 


However the text really needed to be the right way up so used the rotate bar in the 'text' menu to select the number of degrees to move it by.  I found I couldn't select -90degrees exactly so adjusted it afterwards using the box to the top right of the slider.


Here's how it looked attached to the bag.  I managed to print 20 of these for my launch very quickly.  The ladies asked did I have a fancy printer because it printed so nicely.  I put that down to the Whisper White cardstock that I used in my cheap little multifunction printer. 

My Digital Studio 30 day FREE trial

My Digital Studio Full Version - $27.95


Tuesday, May 21, 2013

Tips and Tricks - Punching Small Pieces of Card

I was prepping the cards for Stamp Club following the Class in A Flash instructions that I use for my club.  


I'd stamped my greeting on whisper white cardstock and punched it with the Extra Large Oval punch.  So far so good.  But it was to be layered on the Designer Label punch and I know you'll be very surprised when I tell you that isn't one I own yet.

So what to substitute it with - the Curly Label punch should work except the Extra Large Oval I'd punched was too large to look right.  So I needed to make it smaller.


To fit the oval in the smaller large oval punch I needed to temporarily add in to a larger piece of cardstock.  I placed a small amount of snail adhesive on the back and then removed some of the tackiness before sticking it to another piece of cardstock and sliding it into the punch.


Here's the look of the finished card.


Friday, May 3, 2013

Tips & Tricks - Making the Most of your scraps when making circle flowers.


This is part two of last week's Tips & Tricks Friday which showed how I selected the colours for this card.

Today I'm going to show you how to punch the circles for the flowers using less cardstock than you might think you'll need.  Fabulous if you're making a large number of cards and get to the end and find you've almost run out of scraps.


 I made each of the flowers from two pieces of 1 3/4"x 1 3/4" pieces of cardstock.

I started by punching the smaller circles 1/2" and 1" as far into the centre of the cardstock as I could.

Then I inserted the cardstock into the larger punch (1 1/4") as shown and punched.

Here are all the shapes.


Glued one on top of each other from the back it looks a bit strange.  But turn it over and it's what I used on the card.


I used: -
Elegant Eggplant Cardstock - 108614
Perfect Plum Cardstock - 108615
1/2" Circle Punch - 119869
1" Circle Punch - 119868
1 1/4" Circle Punch - 119861
1 3/8" Circle Punch - 119860


Friday, April 26, 2013

Tips & Tricks - Colour Coach

Having the extensive colour palette that Stampin' Up!® has all sorted into colour families really helps with colour matching.  

Here's a card that I cased from Samantha from Blissful Domesticity.


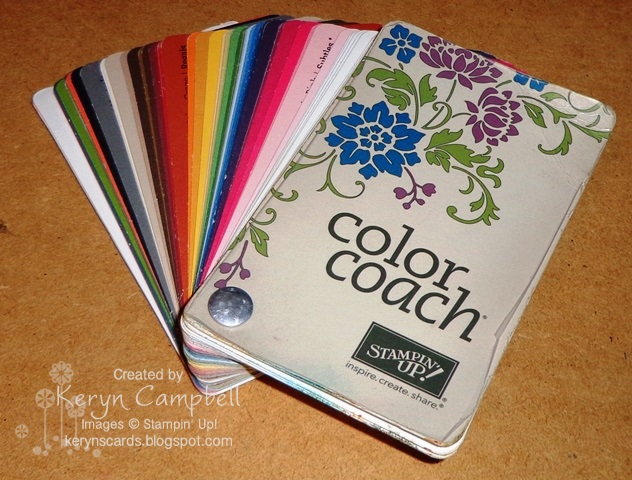
I chose Rose Red as my card base and then worked from there.  When you want three coordinating colours or just a monochrome look (dynamic duo) there is no quicker way than to use the Color Coach (120148).


It contains all of Stampin' Up!®'s current 50 colours, you could probably sneak in cards for retired in colours as well if you have them, held on a large screw so can flick through and put colours side by side to see if they work together.  So much easier than hunting through files of different coloured cardstock.

Or even quicker you could do what I did. I found the card for 'Rose Red' and turned it over showing the combinations that the Stampin' Up!® team like best.  I matched the 'Rose Red' circles with it's dynamic duo 'Regal Rose' and then chose 'Elegant Eggplant' and 'Baja Breeze' as my other two flower colours.  Turning to the 'Elegant Eggplant' card I chose to use it's dymanic duo 'Perfect Plum' to complete the purple flower.  For the 'Baja Breeze' flower I had some 'Tempting Turquoise' scraps that I wanted to use up so didn't check the coach for that combination.


I am grateful for every order placed. Thank you so much. 

Orders can be placed by Emailing me or clicking on the shop 24/7 button below.


Friday, April 19, 2013

Tips & Tricks - Embossing Whisper White Cardstock

I love using Textured Impressions Embossing folders to add texture and remove the look of empty white space, fantastic!


But there are some embossing folders with heavily textured surfaces such as this one 'Woodgrain' that you need to take a bit of care with.


To emboss Stampin' Up!® cardstock like the calypso coral piece here I use the Multi Purpose platform on no tabs instead of tab one to stop the cardstock tearing.


However that didn't work with the softer whisper white cardstock.  It didn't look quite that bad when first embossed. I have to admit to pushing the tears up a bit to make them show better in the photo.


To stop the tearing I stuck a piece of 'Multipurpose Adhesive Sheet' to the back of the cardstock before embossing.  While you can see that the texture has been roughened a bit the adhesive sheet has held the cardstock together while embossing.  It also has the bonus of forming a tight bond with whatever base you are planning on sticking the embossed piece to.  Sometimes tricky with a heavily textured surface.

Multipurpose Adhesive Sheets (120805) come in a pack of 12 12"x12" sheets for $31.95.  They are a tacky adhesive and dry clear so able to be used with vellum and even acetate.


Tuesday, April 16, 2013

Tips & Tricks - An Easy Way to Add a Tag to Tied Ribbon

I've been adding Tips & Tricks every Friday on my main blog.  It made sense to me to also put them here where they'll be easier to find it you're looking for a specific one.

Here's the first in no particular order.


This is a gift of 'thinking of you' cards that I put together as a thank you gift for an awesome Family/Band camp that I went on two weeks ago with my family.
When I'm adding a tag to something flat like this I don't won't it sticking up as sometimes happens when you thread the ribbon through it.  So I've added some adhesive to the tag and stuck it to the cellophane bag.


Monday, January 21, 2013

Extended Candy Wrapper Box


 Get together: -
-     Big Shot and Candy Wrapper Die
-     Cardstock for box – 9”x6” and scraps for decorating
-     DSP – 2”x6” for belly band
-     Stamp Set, ink pad and other decorating items of your choice.


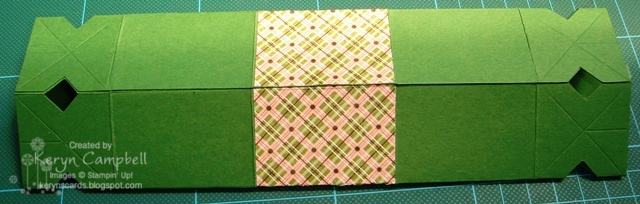
Take 9x6” piece of cardstock and score at 3.5x5.5” along the 9” side.


Concertina fold your cardstock and place on the die.  The cardstock is only fractionally bigger than the cutting area on the die.


Adhere your dsp strip between the centre score lines then score all vertical and horizontal lines.  Don’t worry about the diagonal ones yet.


Using your chosen adhesive, sticky strip or Multi Purpose adhesive both work well, to the thin long tab and stick your box together to form a tube.  I find this easier to do with the box flattened.


With the box flattened fold the diagonal folds up


and back on both ends.  Open box back up and flatten again so the unscored diagonals are open to be folded.


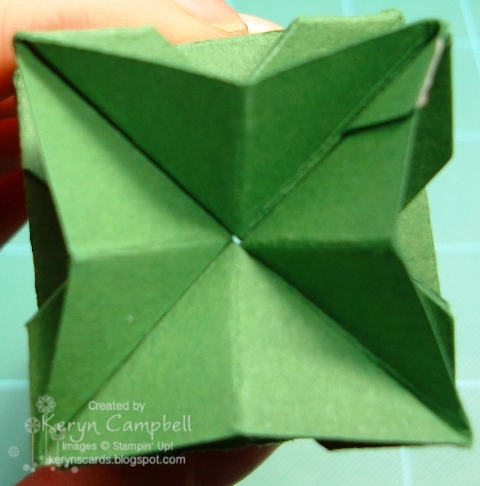
Take end of box and squash like the top of a milk carton opening up again as in the picture.  Slide your thumb and first finger into the points on the sides and twist and press the form the shape shown below.  If you struggle with this take a look at this You Tube video.


Decorate as you choose and you’re done!!


Share