Friday, November 22, 2013

Tips & Tricks - Which Adhesive Works Best With Which Materials

It's always nice to have a reference for adhesives that you can go to before you try to stick something together unsuccessfully and have to start all over again sometimes having to re cut pieces of the project.

In the 2011/2012 Stampin' Up!® Annual Catalogue they had room for a table showing which adhesives worked best with which materials.  I have taken the information from that table and updated it for some of the newer adhesive options.
http://www3.stampinup.com/ECWeb/ProductDetails.aspx?dbwsdemoid=4000827&productID=100425

2 Way Glue Pen - Permanent & Repositionable - works best with Paper, Card & Glitter

 http://www3.stampinup.com/ECWeb/ProductDetails.aspx?dbwsdemoid=4000827&productID=101055
Crystal Effects - Permanent & Creates a 3D effect - works best with Paper, Card, Ribbon, Chipboard, Buttons, Glitter & Clay.
 http://www3.stampinup.com/ECWeb/ProductDetails.aspx?dbwsdemoid=4000827&productID=103683
Glue Dots - Permanent & work well sticking 3D objects - works best with Paper, Card, Ribbon, Chipboard, Buttons & Window Sheets
http://www3.stampinup.com/ECWeb/ProductDetails.aspx?dbwsdemoid=4000827&productID=104045
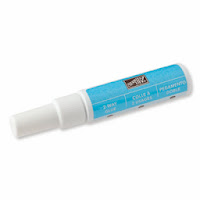
 Anywhere Glue Stick - Permanent - works well with paper, card & fabric.
Sticky Strip - Permanent & works well sticking 3D objects - works best with paper, card, ribbon, chipboard, buttons, glitter & window sheets.
http://www3.stampinup.com/ECWeb/ProductDetails.aspx?dbwsdemoid=4000827&productID=104332
 Snail Adhesive - Permanent - works best with paper & card.http://www3.stampinup.com/ECWeb/ProductDetails.aspx?dbwsdemoid=4000827&productID=104430
 Stampin' Dimensionals - Permanent & work well sticking 3D objects and creating 3D effects - works best with paper, card, ribbon, chipboard & buttons.
http://www3.stampinup.com/ECWeb/ProductDetails.aspx?dbwsdemoid=4000827&productID=110755
 Multipurpose Liquid Glue - permanent, repositionable, works well sticking 3D objects - works best with paper, card, chipboard, glitter & clay.
 Big Shot Multipurpose Adhesive Sheets - permanent - works well sticking paper, card, chipboard & fabric.
Shaker Frames - adheres the same way as Stampin' Dimensionals but shaped to work as a seal for shaker cards.
   Jumbo Sticky Rounds - permanent - works well for creating rosettes, flowers etc using paper, ribbon & fabric.

Click on the pictures for more information about any of the adhesives shown above.


Friday, November 15, 2013

Tips & Tricks - Getting more Use out of your Stampin' Write Markers

All markers run out of ink with use and it's great that the Stampin' Write Markers can be reinked with the Classic Stampin' Ink Refills.  But even though we can reink them it's still a job that's better to only have to do every so often.  

In my early Stampin' Up!® days when I only had a few markers it seemed that the best way to store them was in a mug with the rest of my tools. 


I think most of us have something like this that we store our 'need to have in reach' tools in.


However most of those markers now have tons of ink still in the brush end and very little ink, if any, in the journalling end. 


After finding out this was not a great way to store my Stampin' Write markers I stored them flat in a plastic cutlery tray until I moved them to the Clear Mount Stamp Cases when they were released.


Since then my markers have kept their ink at both ends.  Store your markers in their Clear Mount Cases flat like in the photo above or sitting on the spine. Don't be tempted to make them fit nicely with your clear mount stamp sets which will mean storing the markers standing up.

I hope this helps you get a lot more use out of your Stampin' Write Markers.  If you have any questions feel free to Email me.


Friday, November 8, 2013

Tips & Tricks - Washi Tape Pegs

I'm very fortunate in my Stampin' Up!® world to be surrounded by talented paper crafters.  One of those ladies is Kirsty (StampIN-K).  She graciously shared her Washi Tape pegs with the team at our latest team gathering.

This is the way I've found that works best for me to get the Washi Tape to stick nicely to the peg.

I didn't find it easy using the Washi Tape while it was still attached to the roll.  Yes I used less tape but I found it fiddly so....


I ripped off a slightly longer piece than necessary and laid it flat, sticky side up.  the peg gets placed on to the tape matching one side up perfectly.  N.B. Putting the side with the wire against the edge of the washi tape now makes cutting along the edges easier in the next step.


Using your paper snips trim the tape along the other three edges.


Decorate as you please.  I use Sticky Strip to adhere my embellishment to the peg and placed so it hid the wire.


Friday, November 1, 2013

Tips & Tricks - File Folder Card


This card could be landscape or portrait, it could have one side shorter than the other, it could be a journalling pocket or a gift card pocket.  Once you've got the basics below sorted I'm sure you'll find all sorts of ways to use this technique.

Start with a standard folded A5 card base.


Insert the corner of your card base into the punch board as shown & punch.  The edge should be up against the inside edge of the score guide.


Move the punched edge along to the 3" mark and punch again.


Align the punched edge in the paper trimmer as shown with the groove along the bottom of the punched shape.  Trim to remove the card to the top of the punched shape.

 
Flip your card and repeat on the opposite side.

Finish your card as you choose.

I used: -
 - Teeny Tiny Sentiments Stamp Set - 130042 (wood), 120024 (clear)
 - Gorgeous Grunge Stamp Set - 130514 (wood), 130517 (clear)
 - Smokey Slate Cardstock - 131291
 - Midnight Muse Cardstock - 127546
 - Whisper White Cardstock - 106549
 - Smokey Slate Classic Stampin' Pad - 131179
 - Midnight Muse Classic Stampin' Pad - 126860
 - Envelope Punch Board - 133774
 - Word Window Punch - 119857
 - Stamping Sponges - 101610
 - Basic Grey Stitched Grosgrain Ribbon - 126879