Monday, September 24, 2012

Framed Tulips Embossing Folder - Double Embossed Lines

Get together: -
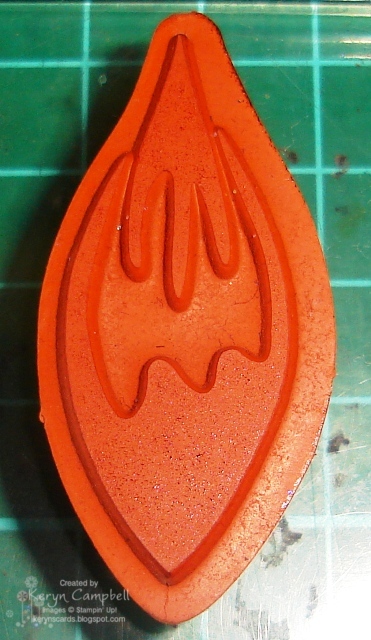
- Framed Tulips Embossing Folder or Something Similar
- Big Shot
- Card to Emboss – read through instructions to see the final look of the card before you cut.


Line up your cardstock and the embossing folder to emboss the inner most line.
Run through the Big Shot. I found it was better on the base of the multi purpose platform with no tabs.


Line up the edge of the embossing folder along the edge of the embossed line and run through the Big Shot again.


Add to your card and decorate as desired.


I used: -
Stamp Set: - Because I Care (retired), Confetti
Paper: - Baja Breeze, Marina Mist & Whisper White Cardstock, Navy coloured felt.
Ink: - Night of Navy & Marina Mist Classic Stampin’ Pad
Punches: - Large Oval
Accessories: - Big Shot, Framed Tulips Embossing Folder, Blossom Party Originals Die, Stampin’ Sponge, Snail Adhesive, Glue Dots, Stampin’ Dimensionals, Paper Cutter


Share

Tuesday, July 10, 2012

Using the Beautiful Butterflies Die

The Beautiful Butterflies Bigz Die has four butterflies. Two show as full butterflies and the other two as half butterflies.


I cut a strip of Greenhouse Gala DSP and covered the full butterflies with that.


Then took another strip folded it in half placing the fold along the open side of the half butterflies and cut usually the Big Shot in the usual way.


This is how the butterflies look when popped out of the die.


This is how they look when the half butterflies are opened up.


I chose the two smallest butterflies and sponged the edges with baja breeze classic ink then covered the fold in the top one with basic pearl jewels and then did the same with the bottom one to match.


Here’s the finished card. I used the debossed side of whisper white cardstock embossed with the Manhattan Flower embossing then mounted on Not Quite Navy cardstock and a Baja Breeze Card base. The card was then finished off with a Thank you message from the ‘Because I Care’ Level One hostess set punched out with the Large Oval Die.


Share

Wednesday, July 4, 2012

Builder Punch Placement

Often when using a 'Builder Punch' (e.g. Owl, Two Step Bird, Blossom Petals) in a hurry I stamp the matching image and punch it out only to find that the hurried placement of the image has meant that I've punched out a lot of shapes I didn't need and wasted cardstock.


 For this project I'm using the Blossom Petals Builder punch and the Build a Blossom Stamp Set.  

I've chosen the stamp I want to use.

Before stamping the image choose the part of the punch that matches the stamp and position it on your cardstock in a position that creates the least waste.

Then stamp in that position and punch.  Then repeat for the number you need and start with the other images.

Share

Thursday, March 1, 2012

Embossing just the front of your card

Embossing is a quick and easy way to fill up white space on a card, but what if you want to it straight onto your base card without adding another layer.  I'll show you how to position your card and embossing folder in the Big Shot to only emboss the front of your card not all the way through.


Cut your card blank so that the front will fit sideways inside the embossing folder as you see above.  Position the card in the folder with the edge of the folder against the score/fold line for your card blank.


Run the embossing folder through the Big Shot so that the overhanging card doesn't get caught by being on the side.


This is what you'll end up with if use the Perfect Polka Dot embossing folder like I did.


Another tip for a quick and easy embellishment is using a die like Blossom Party originals and using up scraps or cardstock to cut just the shapes that you need.  You don't have to cut all the shapes each time to need just one or two.


This is how I put my card together.

I hope this helped you get more use out of your Big Shot.

Share

Monday, January 30, 2012

Omitting part of an image using an Ink Pad


This was one of the cards we put together at a recent class.  The instructions told us to stamp and colour the full image then cut out around the clock piece and adhere to the whisper white cardstock circle.  It would have been a struggle for the beginner cardmakers.

One form of omitting that I think most of us use is to ink just the pieces we want on an image with Stampin' Write (brush) markers, but what do you do when you want the image to still be stamped in Stazon Jet Black ink.

Here's the solution that we used: -

This is what the complete stamped image looks like.


To remove the hello I covered it with a piece of sellotape (sticky tape).  I used removable tape but it doesn't need to be.  Ink your stamp as usual with the tape in place.  Make sure you remove the tape before you stamp your image.


For the card above the ladies at the class stamped their image like this, coloured it using Stampin' Write Markers and punched it out with the 2 1/2" circle punch.  No cutting involved.

I hope this helps you get more use out of your stamped images.


Share