I personally find bows incredibly difficult to tie nicely. This technique gives the look of a bow without having to actually tie one.
The trick to getting away with not tying an actual bow is to have another decorative way of holding the ribbon together. I’ve chosen to use Jumbo Grommets but you could use designer brads or any other embellishment that will get the job done.
This tutorial uses the jumbo grommets found in the current Stampin’ Up!® Summer Mini Catalogue up until 31 March 2010.
Step 1: - Cut ribbon to a length slightly longer than double the size of your finished bow. I want my bow to be approx 5cms long so have cut my ribbon at 12cms. Make sure the ribbon chosen is slightly wider than the diameter of your chosen embellishment. I used chocolate chip 1” double stitched grosgrain ribbon.
Step 2: - Stick ends of the bow together to form a loop. I just used my Snail Tape Runner and placed one end over the other. It only needs to hold into the grommet is attached. I wouldn’t use sellotape as it would be another layer to have to force the brad through.
Step 3 – Gently push the prongs on the brad through the centre of the ribbon loop.
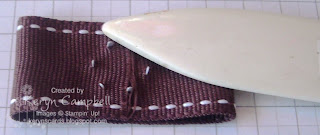
Step 4 – Use the side of a bone folder flatten the prongs.
Step 5 – to use my embellishment on a card I have cut a square of Windsor Knot Designer Series Paper and stuck the ends of my strip of ribbon to the back of paper.
Step 6 – Position your faux bow over the ribbon using Sticky Strip or other strong adhesive.
Step 7 – I finished my card by mounting my embellished DSP on a layer of Chocolate Chip cardstock and on to a Sage Shadow card base. Your can use any greeting to finish it off. I’ve chosen to use initials using the Big Deal Stamp Set and Chocolate Chip Classic Ink.
Please leave me a comment with a link to any faux bows you include on your projects. I'd love to see what you come up with.
Leave a comment or EMail me with any queries you have.

Share


